How to connect your Acuity Scheduling account
If your store uses Acuity Scheduling, you can connect it to Revide in just a few minutes.
This allows brides to view your real-time availability and book appointments directly through your store profile.
There are two steps to connecting successfully:
1) Connect your API Key (explained in this article)
2) Sync your hours and appointments (explained here: https://support.revide.xyz/article/16-what-happens-after-you-connect-acuity-scheduling)
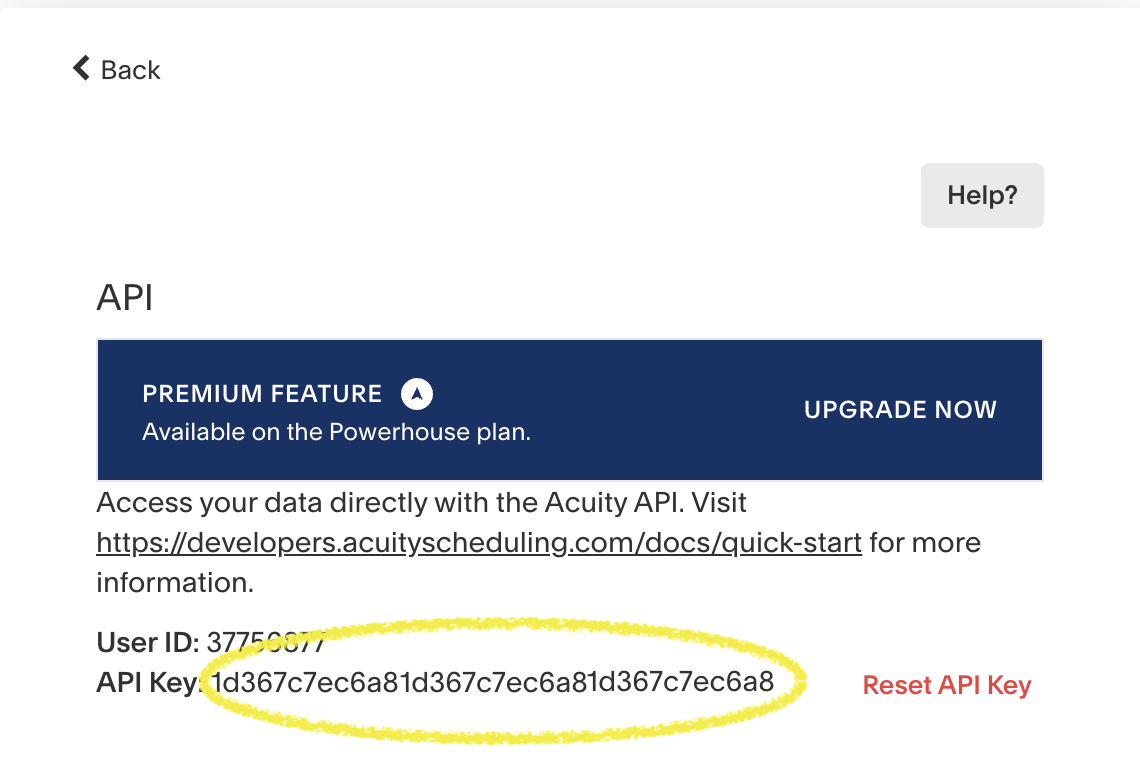
Step 1: Find your Acuity API key
- Log in to your Acuity Scheduling account
-
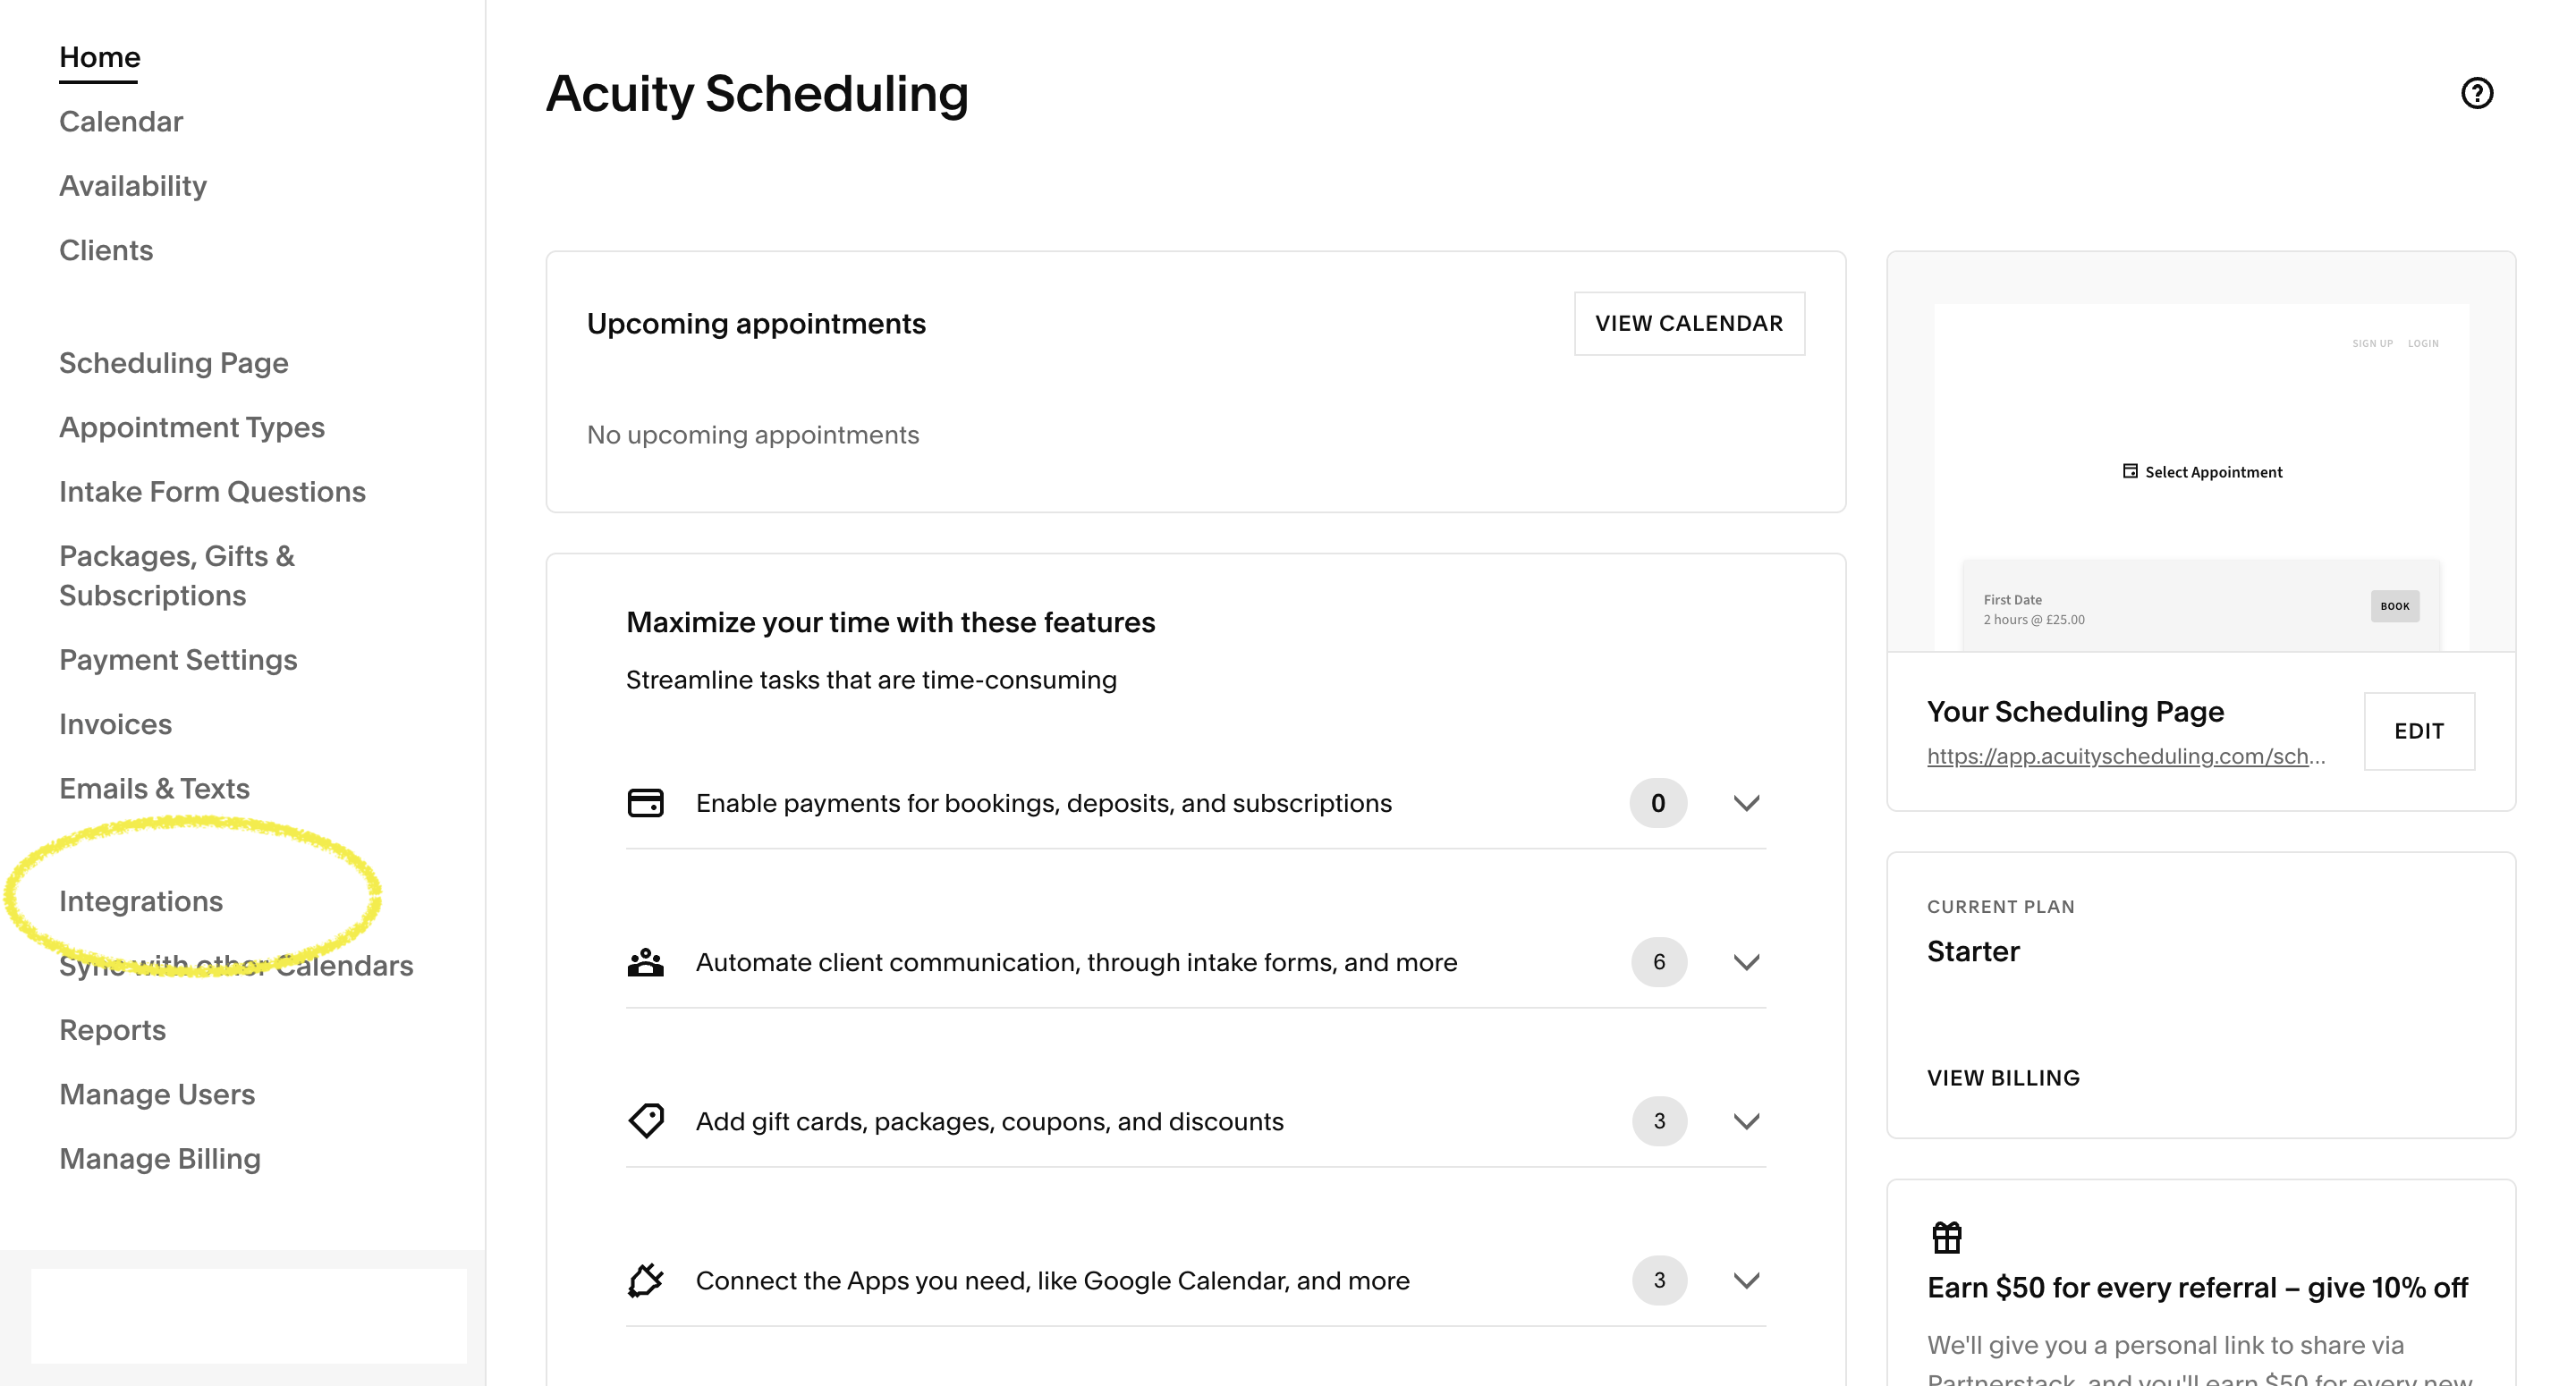
- Go to Integrations
-
- Scroll to API
-
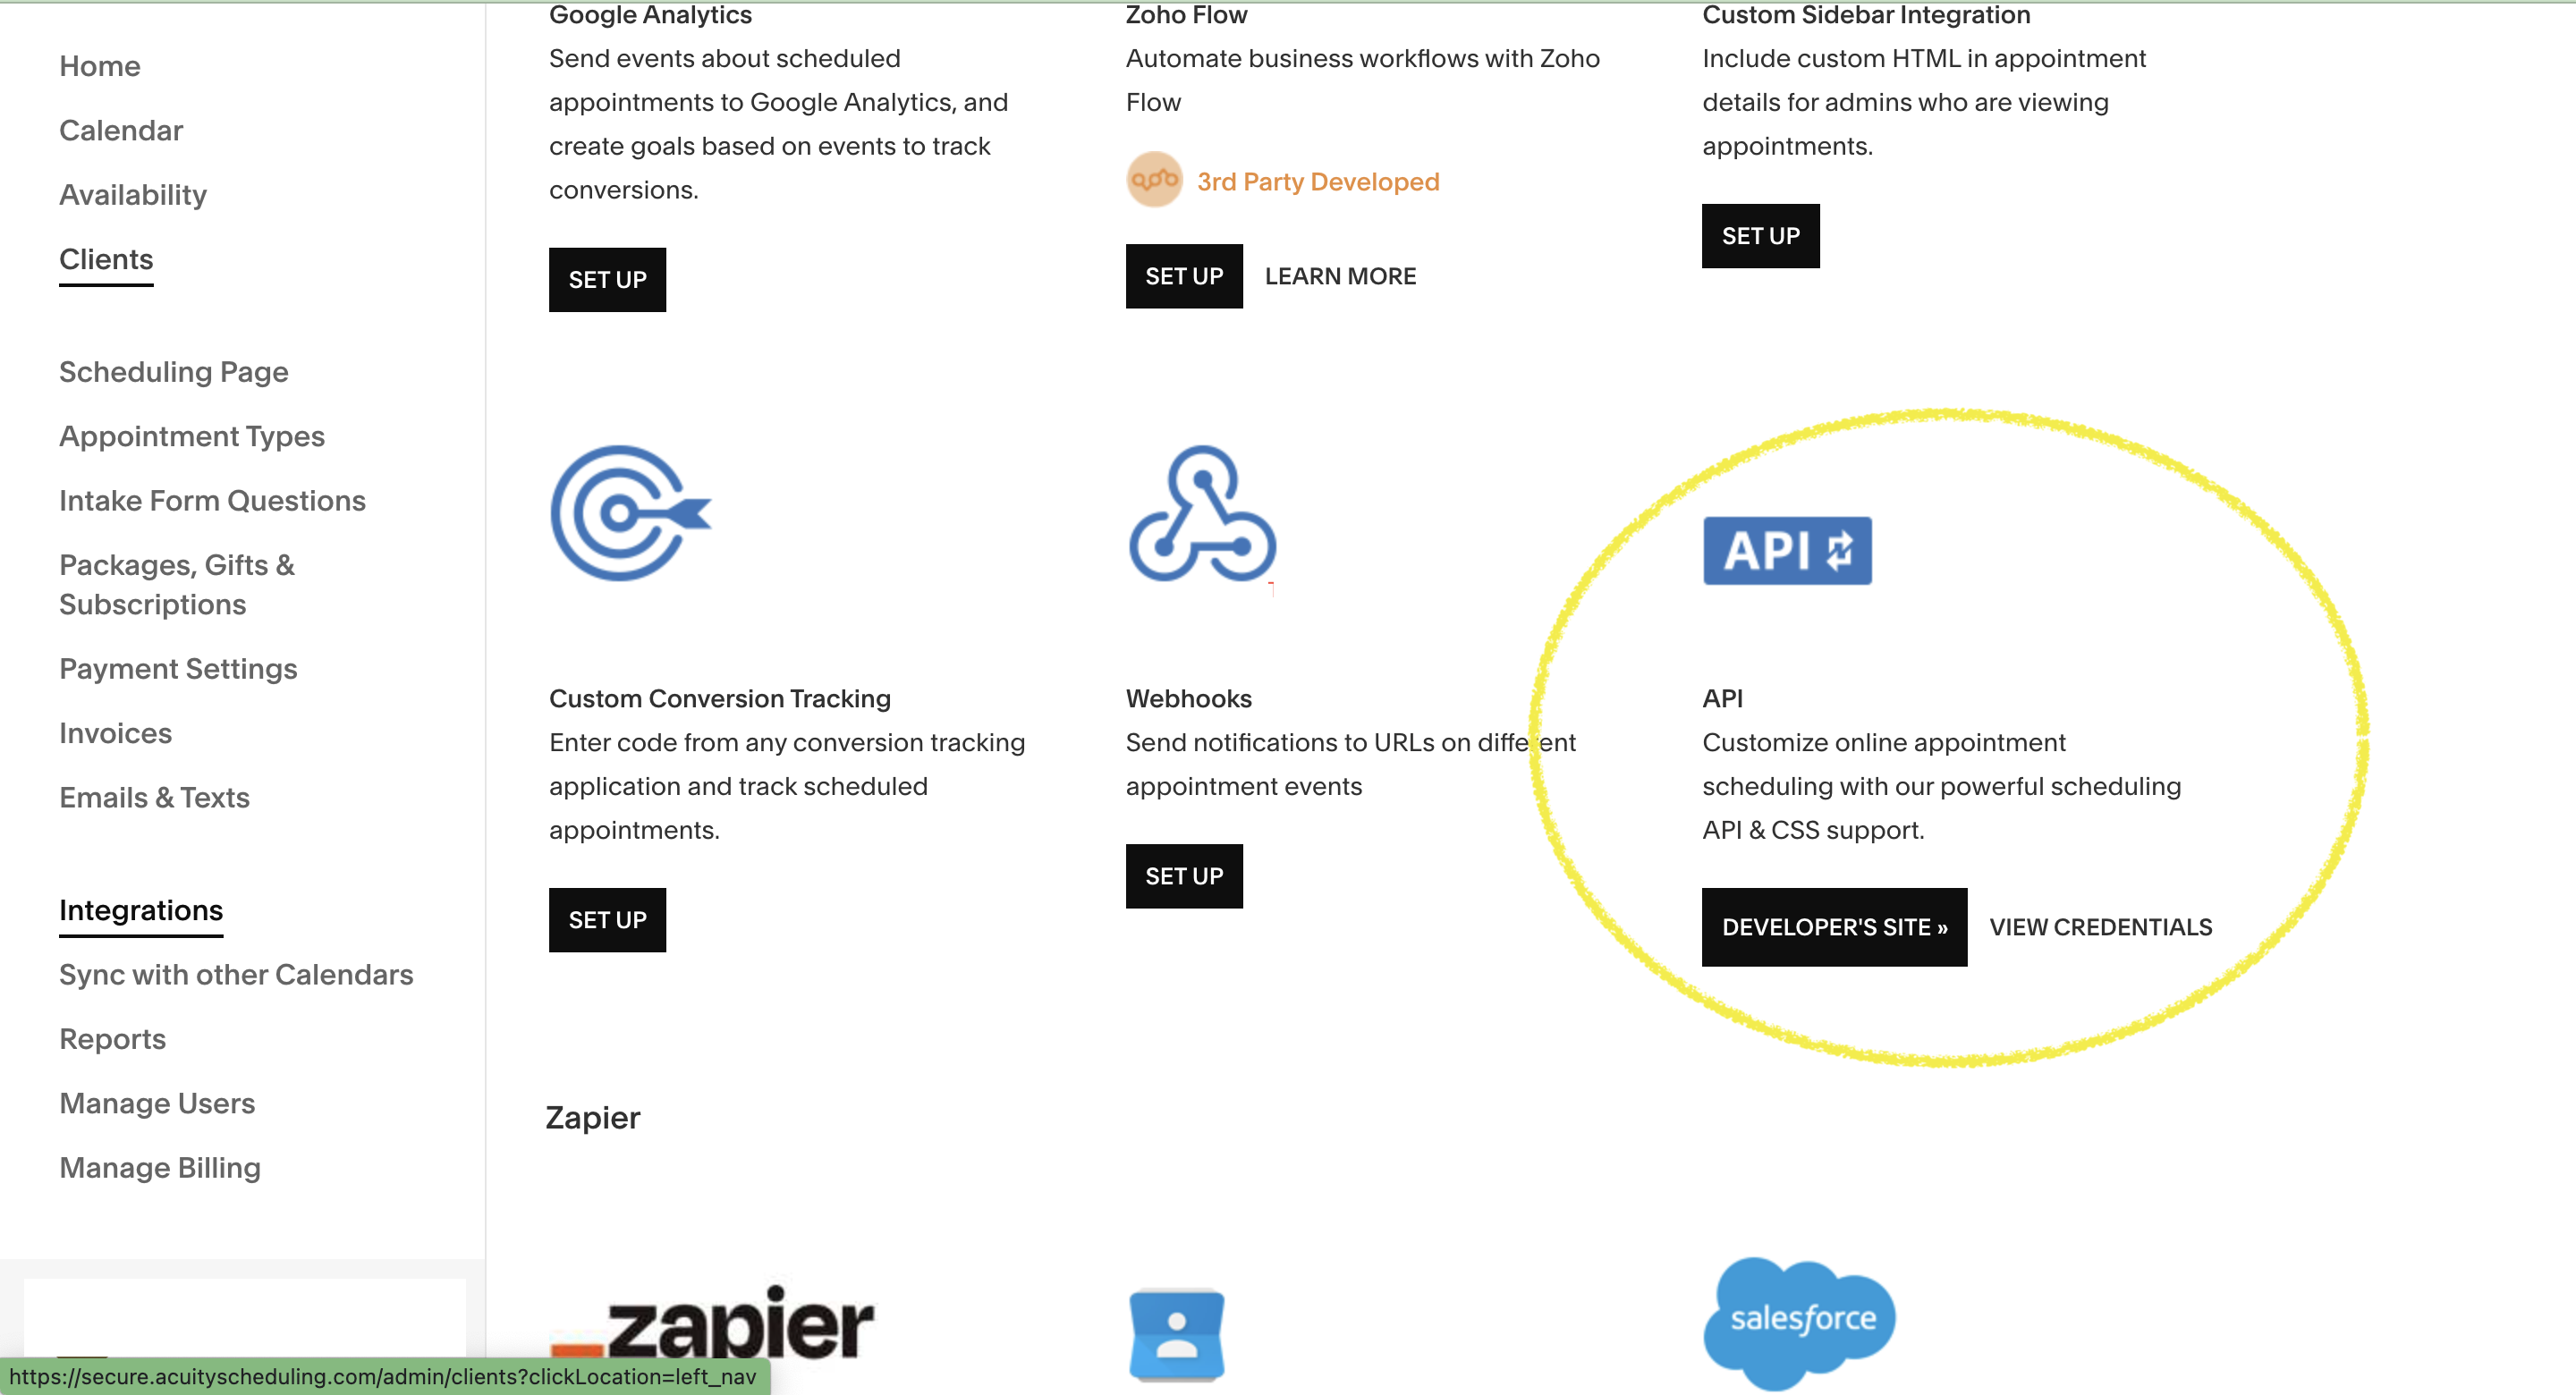
- Click View Credentials
-
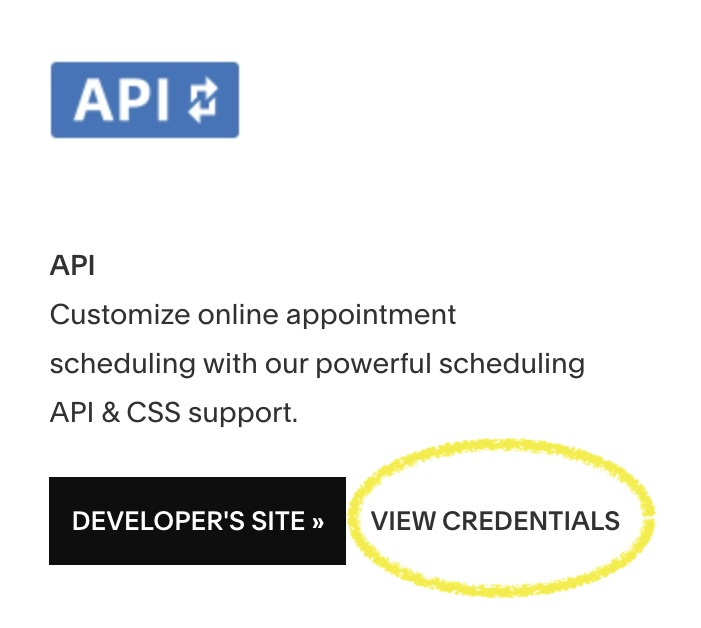
- Copy your API Key
-


Step 2: Add your API key to Revide
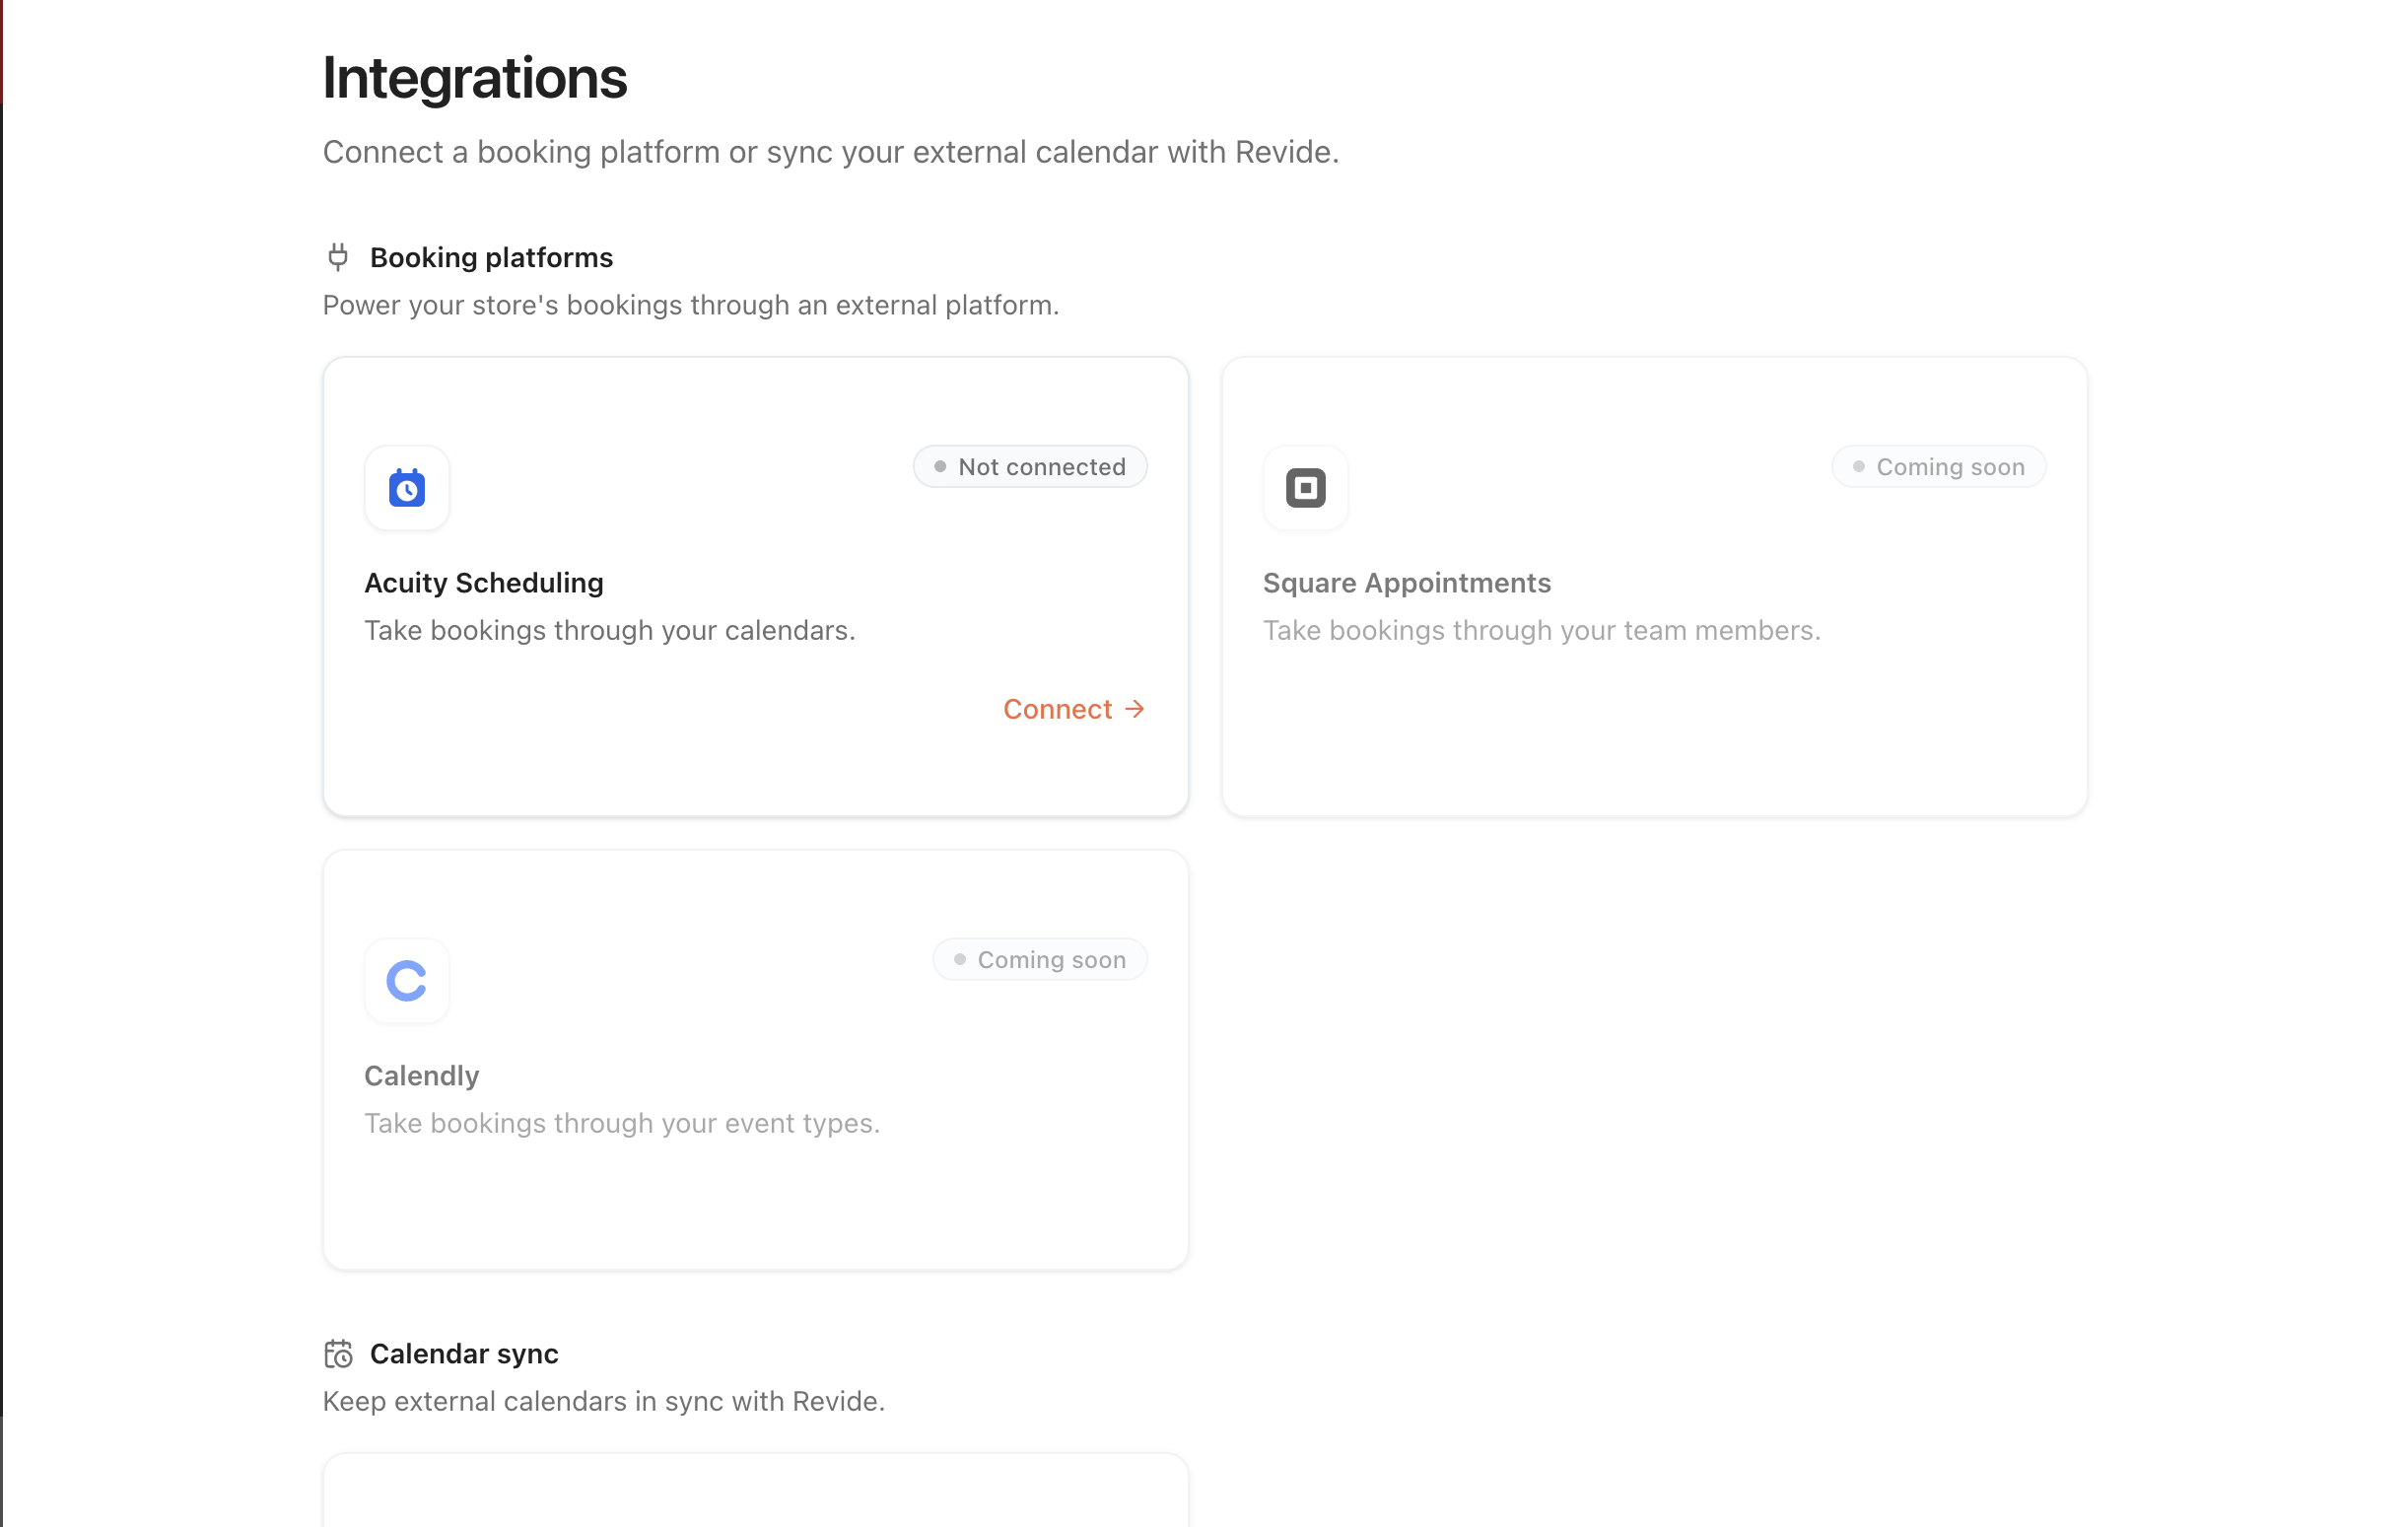
- Log in to your Revide dashboard
- Go to Integrations
- Click Acuity Scheduling
-
- Paste your API key into the field provided
-
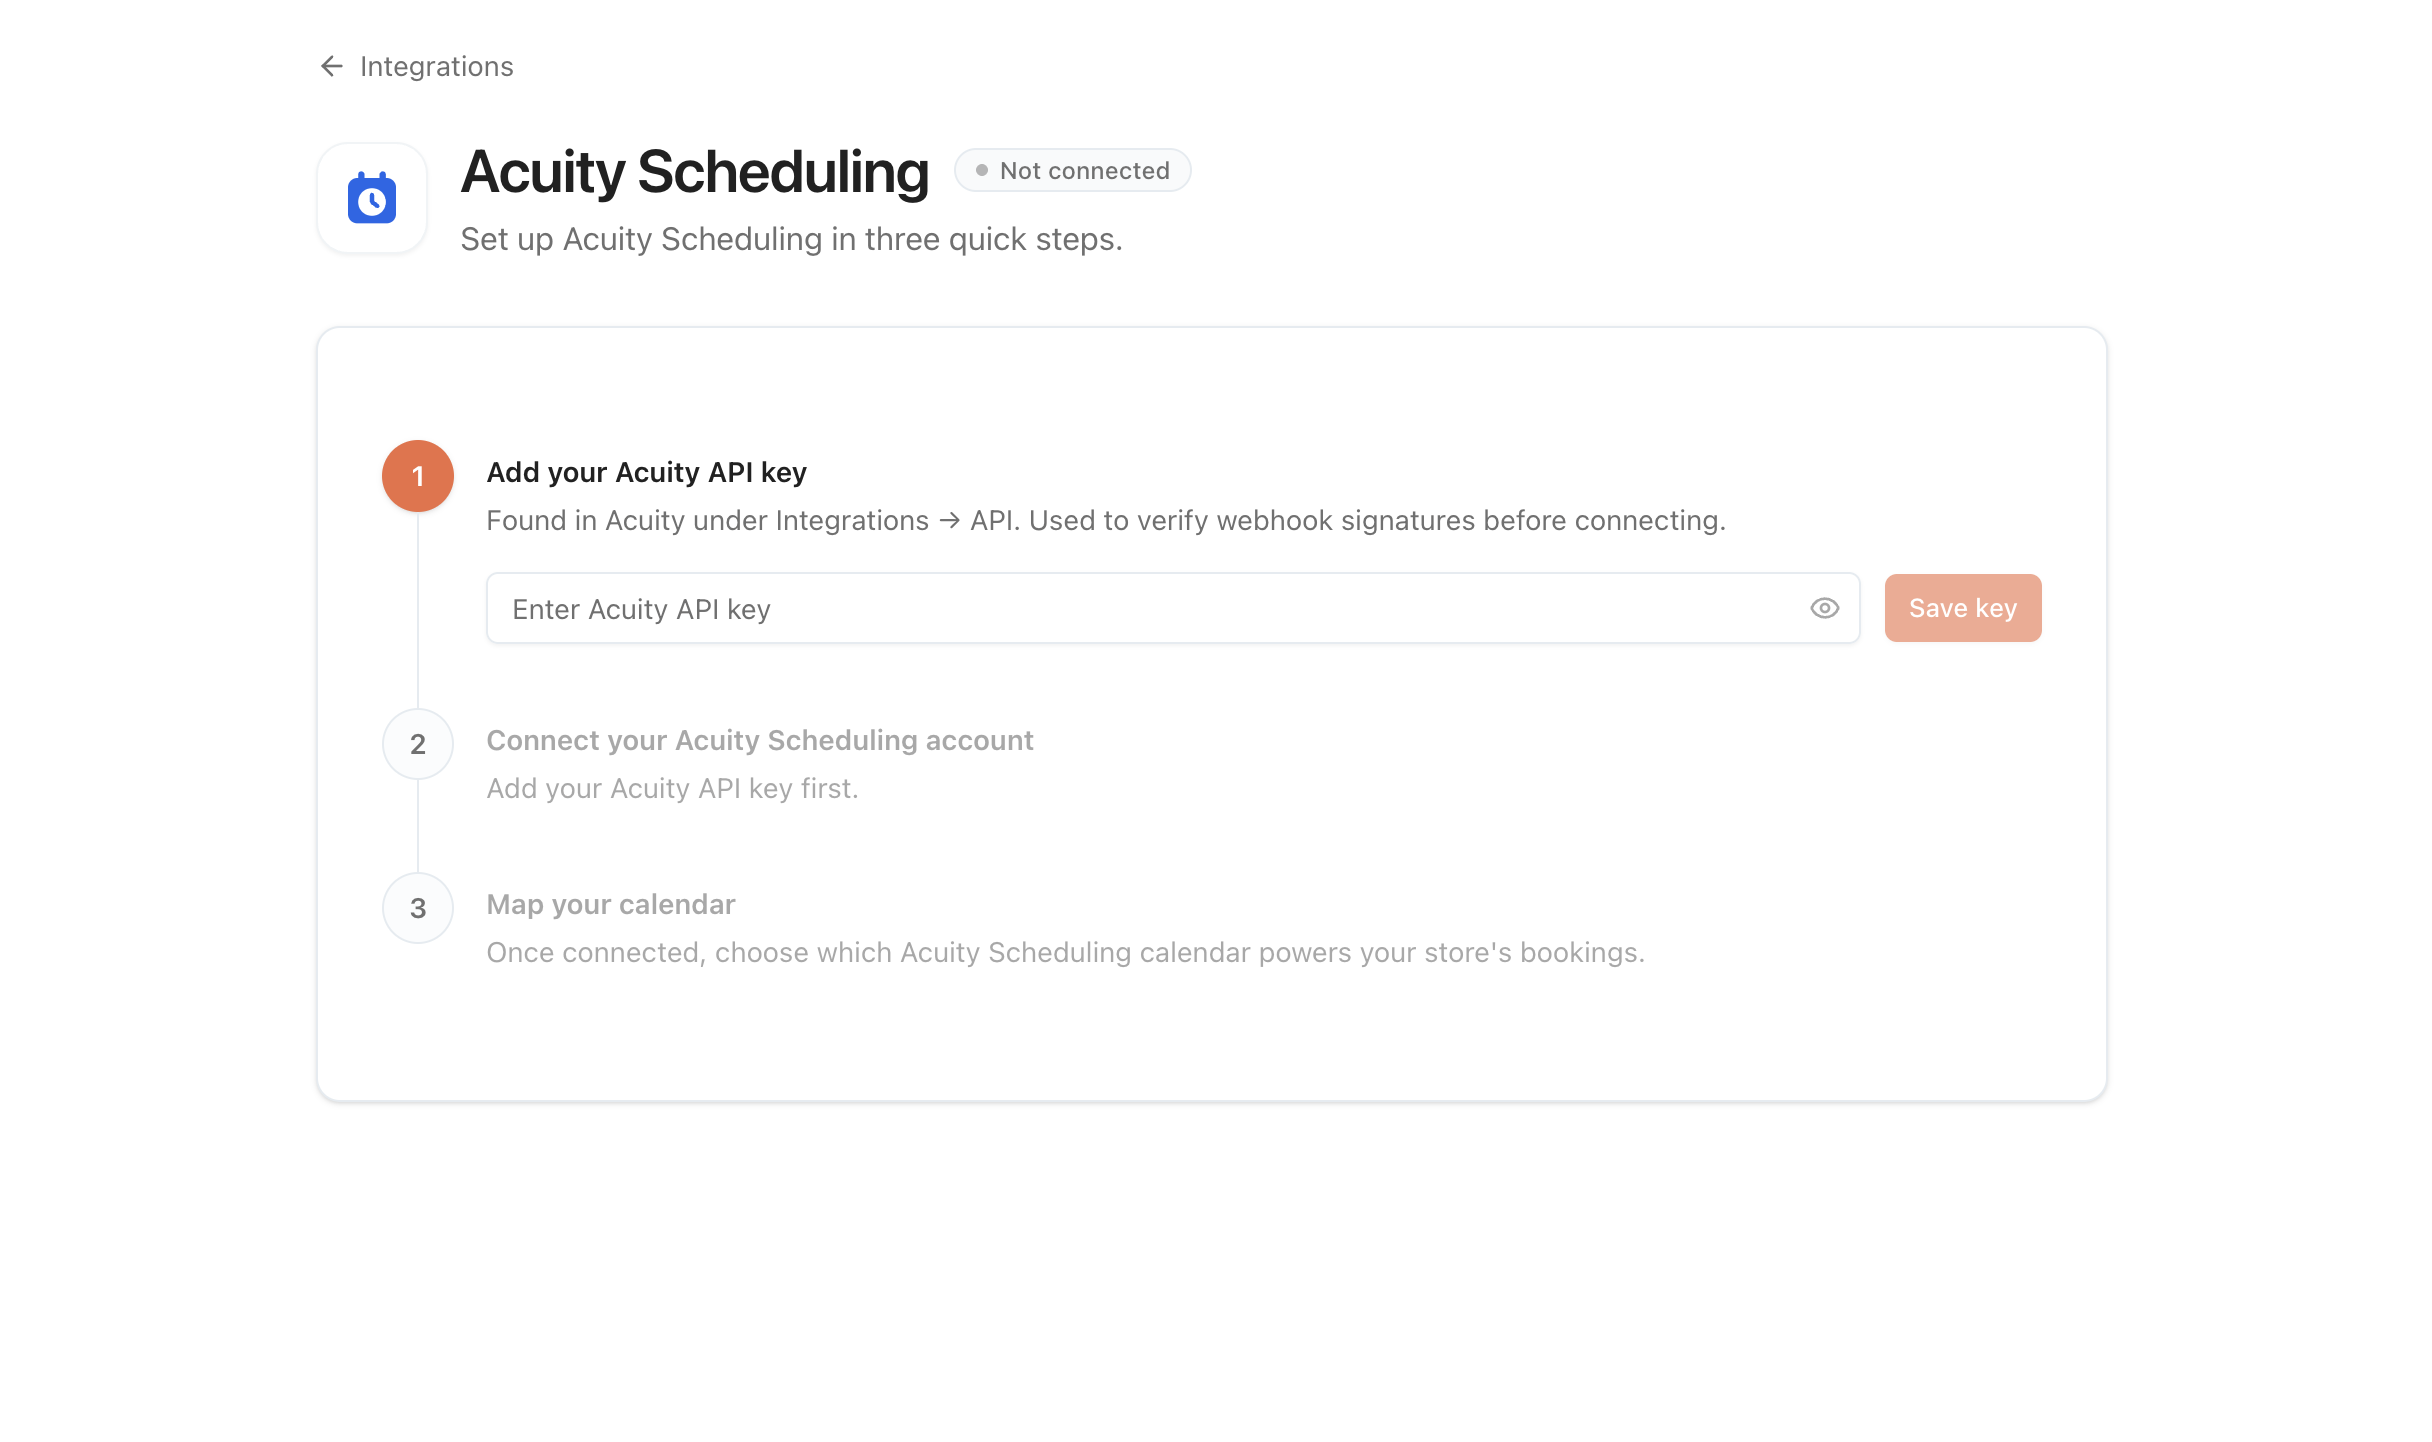
- Click Connect with Acuity Scheduling
-
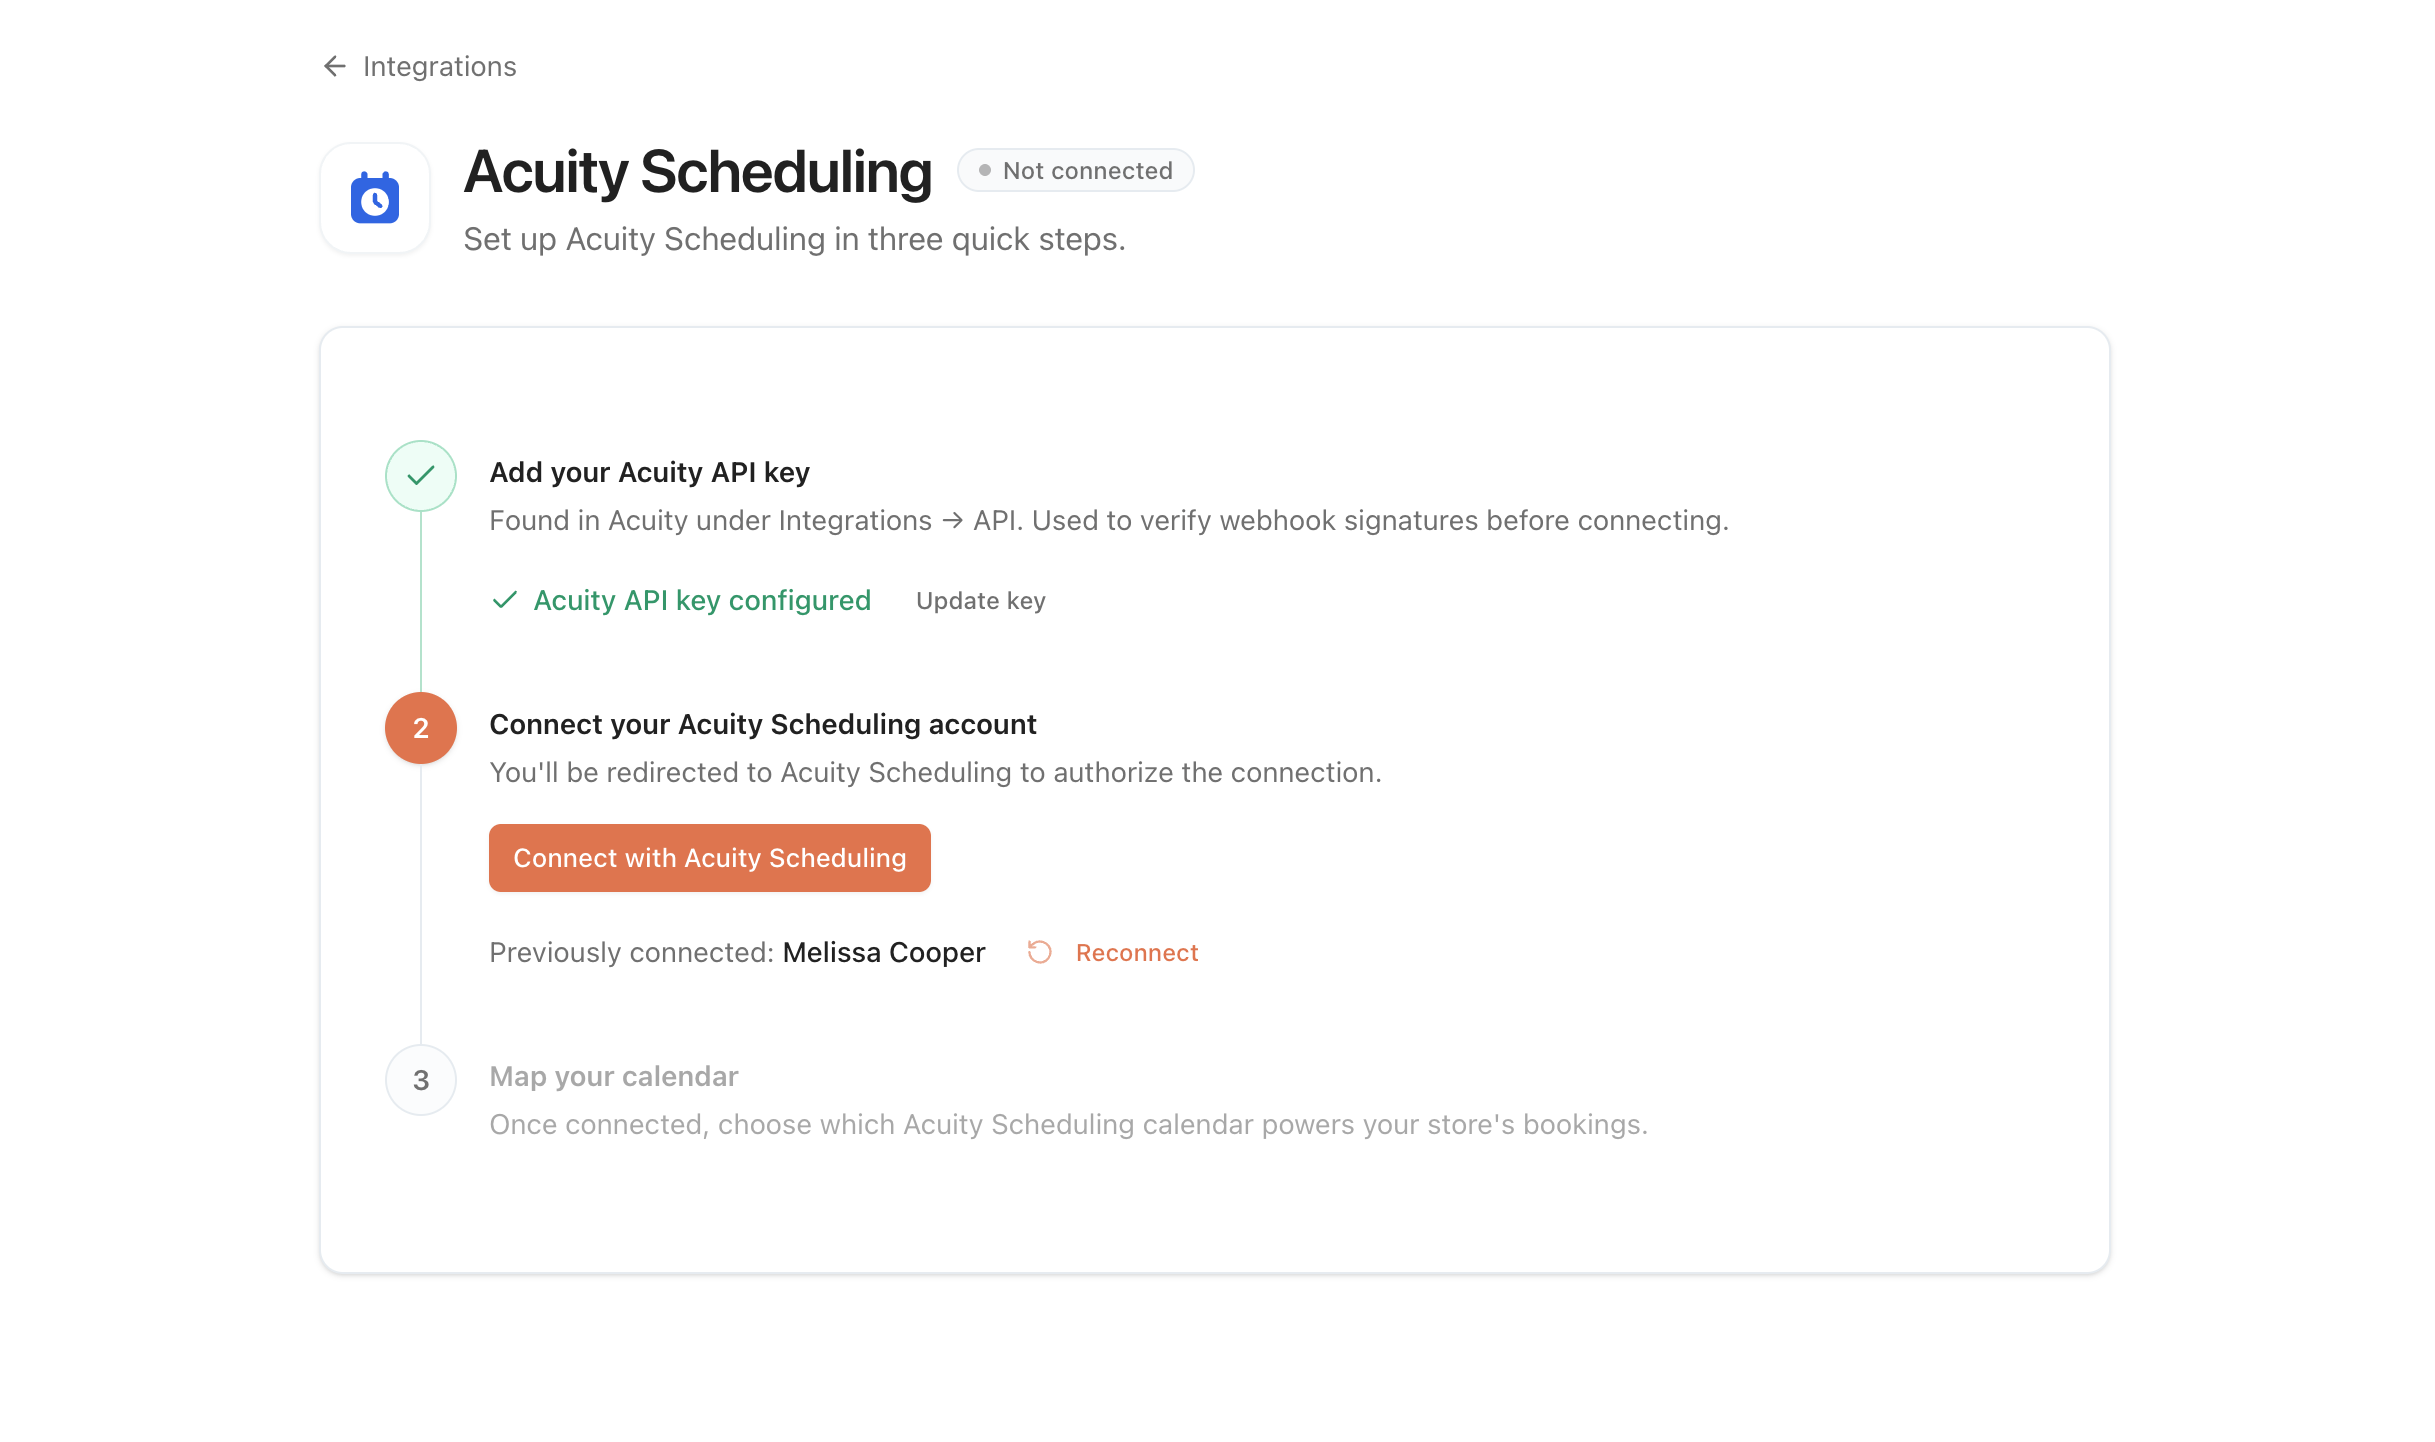


Step 3: Connect your account
Once your API key has been added:
- In the Connection status box Click Connect
-

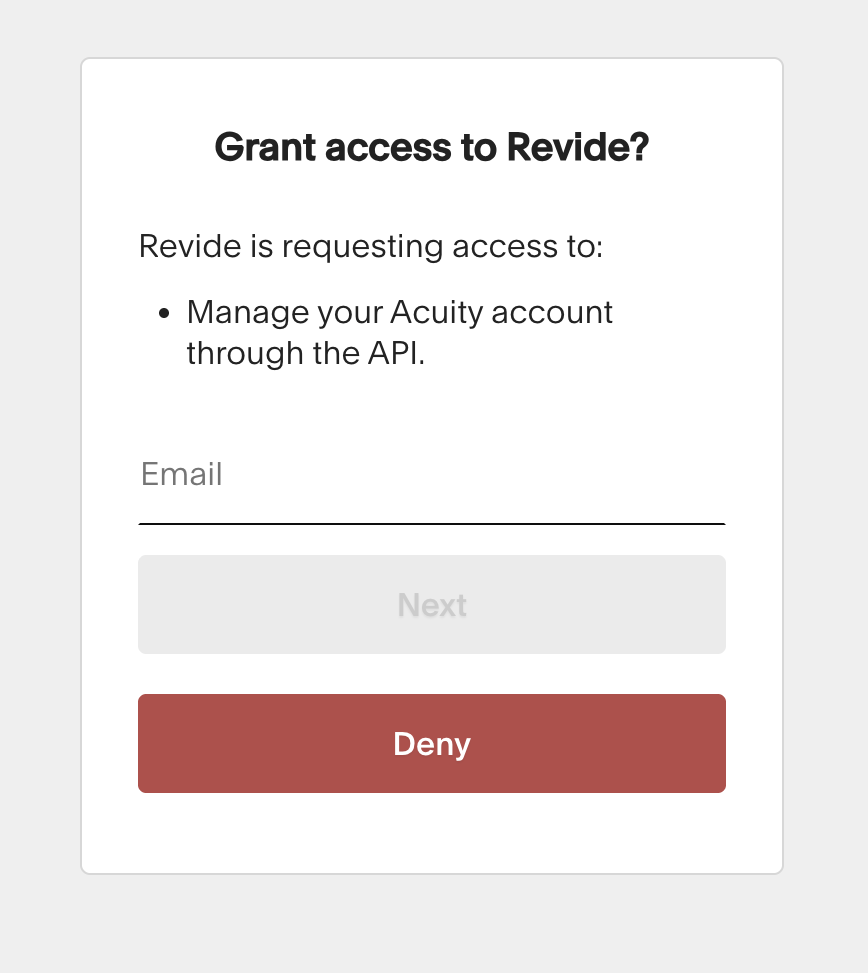
- You may be asked to approve access to your Acuity account
-

- Once approved, your account will be connected


What happens next
Once connected jump to this article https://support.revide.xyz/article/16-what-happens-after-you-connect-acuity-scheduling to sync your Store's hours.
There’s no need to change how you currently work — Revide simply brings more bookings into your existing system.
Important to know
- Your API key is used securely to connect your account
- You can update or remove your key at any time
- Changes in Acuity will automatically reflect on Revide
Not using Acuity Scheduling?
You can still receive booking enquiries through Revide without connecting a calendar.
👉 How the booking system works
Need help?
If you’re unsure where to find your API key or need help connecting, just reach out support@revide.xyz — we’re happy to help.